Boat Building - PVC Skin - Prep, Glue, Cover Hull, Stems, and Deck
Prepping and Gluing
The skins are made from 18 oz "Coverlight" PVC. This material has a polyester core that is coated both sides with vinyl. The PVC is glued with HH-66 vinyl cement. Both PVC and vinyl cement can be purchased from Mauritzon Inc. (see under Contacts)
Prepping the Surface
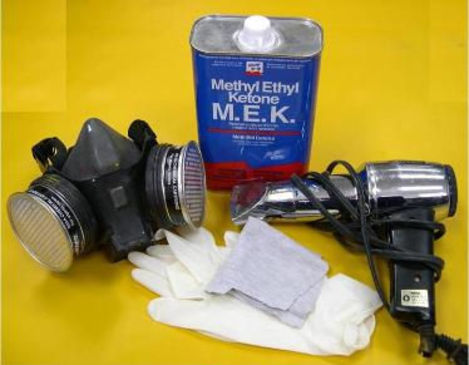
Methyl Ethyl Ketone (short MEK) is applied with a cloth to clean and prep the surfaces being
glued. This process dulls the surface allowing the vinyl cement to
adhere better. Apply enough MEK to wet out the surface. Some PVC color
will be picked up by the cloth.
Moisture is a by-product of MEK . It's critical that the surface dry
completely before applying vinyl cement.
A heat gun helps by drying the surface quickly before the cement is applied.
Gluing
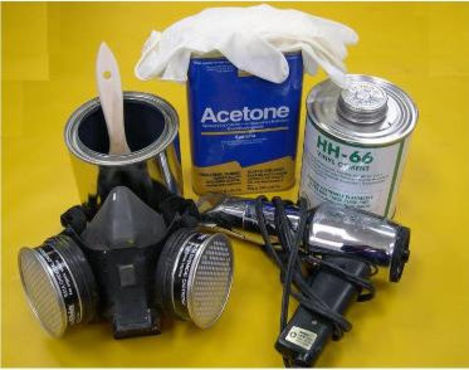
Both surfaces to be glued receive 2 or 3 coats of brushed HH-66 vinyl
cement thinned 10% with acetone. Each coat is allowed to dry to the
touch before the next is applied. As with MEK, a heat gun will speed up
the drying process. Apply thin even coats, avoid excess brushing, and be
sure there are no areas that have been missed. When in doubt, apply a
third coat to insure complete coverage.
After all coats are dry, the overlapping PVC sections are positioned and
held in place with masking tape. A heat gun is used to reactivate the
glue, and pressure is applied by hand to insure a strong bond. More
information on this process will be included in upcoming chapters.
Use 1", 1.5", and 2" brushes. Inexpensive soft bristle brushes work
fine. The brushes can be stored in a can with the vinyl cement. Cut off a
section of the brush handle to allow the lid of the can to be closed.
In this way, the brush will last for numerous applications. If you are
using other than HH-66 vinyl cement, follow instructions specific to
that cement.
Note
Always wear a respirator and work in a well ventilated area.
Covering the Hull
One Piece
The frame
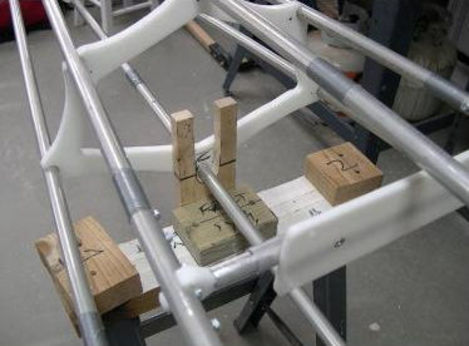
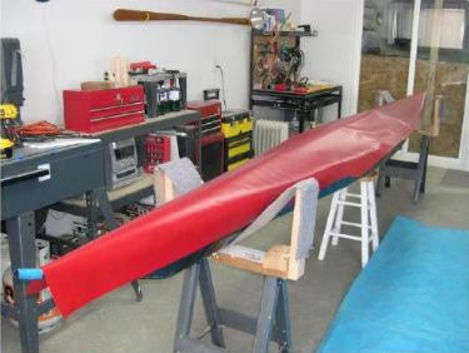
is mounted hull side up on sawhorses using two small stations. In order
to maintain the designed amount of rocker, the stations are screwed to
cross sections 3 and 6 after leveling up the frame. The stations are the same ones used in constructing the frame, deck side
up, at cross sections 1 and 8. The stations can be either HDPE or
wood.
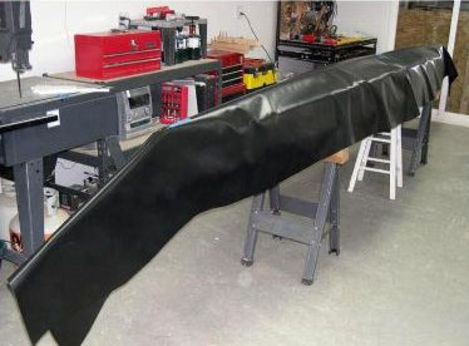
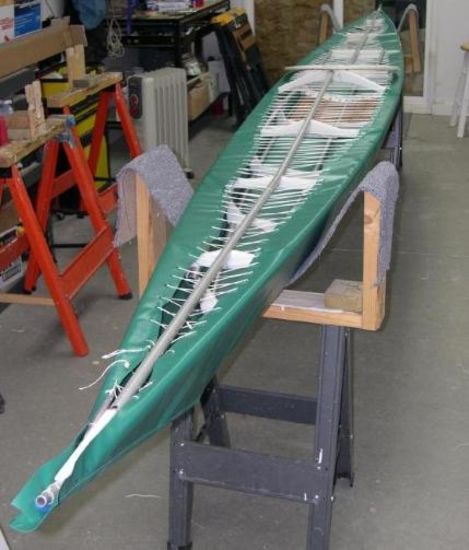
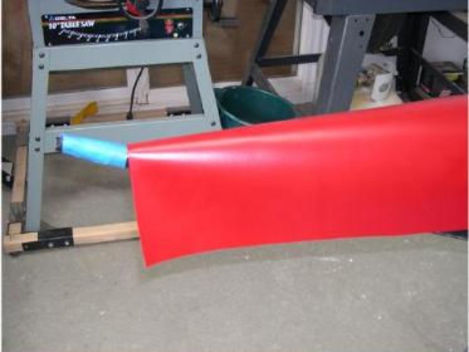
PVC is draped over the hull. Masking tape is placed on the keel near
the bow, center, and stern to check for movement during cutting and
lacing. Trim the PVC to within 3 inches of the gunwales on either side
until you get near the ends. When skinning the ends, the PVC will be
pulled up and over the stems requiring several additional inches of
material below the gunwales at the bow and stern.
Let several inches of PVC extend past ends of the frame. It's always better to have too much rather than too little.
In cool weather, place heaters under the hull to make the skin more
pliable. Electric, oil filled radiators do a good job. Allow the room to
heat up for an hour or so. With the aid of an assistant, stretch the
skin lengthwise to reduce it's tendency to wrinkle around the gunwales.
Note
All PVC cutting and trimming
is done with a heavy duty pair of scissors. PVC does not fray, so there
is no need to cut and sear with a hot-knife.
Temporary Lacing
Temporary lacing is used to attach and tighten the hull skin to the frame. The lacing holds the skin in place until the deck is atached. After the zipper is installed, and the skin cut open, the lacing will be removed.
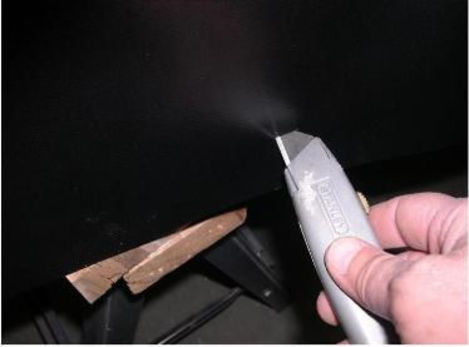
Cut 1/2 inch
slits every 2 - 3 inches along the gunwale overhang.
These will be used for the temporary lacing. Cut the slits starting at
the center and work to within a foot of the stems initially. A Stanley
razor knife is ideal for this purpose.
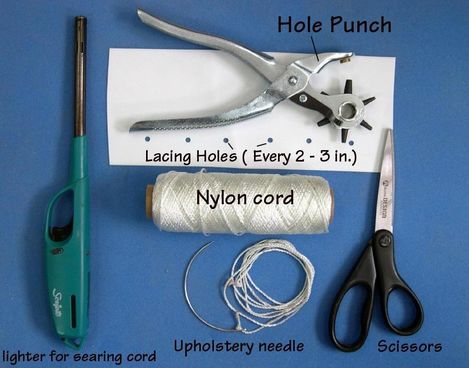
A second method ( preferred) is to use a hole punch tool to cut holes in the PVC every 2 - 3 inches. Lace the skin with nylon cord.
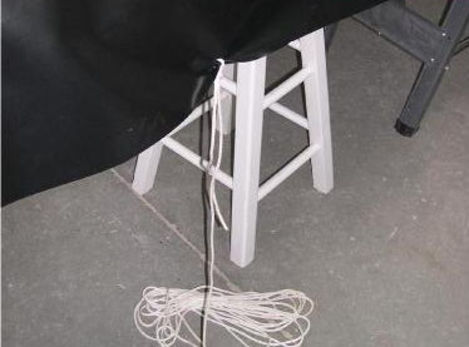
Tie 1/8 or smaller nylon /polyester cord to the center of the PVC
overhang near the coaming area. Sear the ends of the cord with a lighter to prevent
unraveling.
Use an 8 - 10 foot section of cord and lace a cris-cross pattern along the gunwales. Lacing is done from one side to the next, alternating back and forth as opposed to lacing from both sides as is done while lacing up a shoe. If the lacing has a small enough diameter, use an upholstery needle to perform the lacing.
Lace the skin loosely working towards the bow. Tie additional cord to the original as you proceed. If the cord section is too long, it will be difficult to work with.
Tighten the lacing every couple of feet to keep it snug. Lace to within 1 foot of the bow before tying off the cord. Repeat the process at the stern.
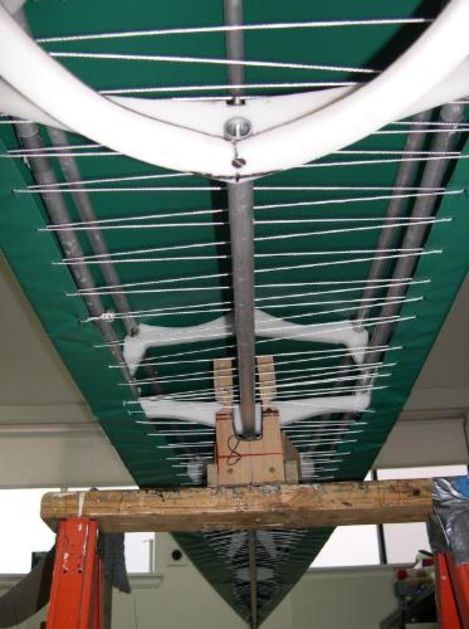
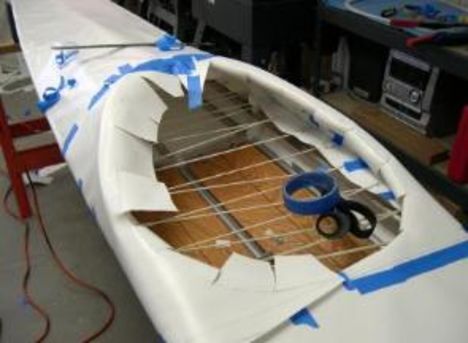
View from
underneath after the lacing has been tightened and tied off
approximately 12 inches from the stems. Note that the lacing goes under
the coaming and deckridge. This is done because the lacing will remain
in place until after the deck is skinned. In this way, the lacing will
not interfere with the deck skinning process.
The skin has been tightened to a snug fit. This will insure that the
skin will stay in place when turned over for skinning of the deck. Of
more importance is to not over tighten the skin. If too tight, it may
recoil a little after the deckridge is cut open and the lacing removed.
If so, it may be difficult to close the skin when in use.
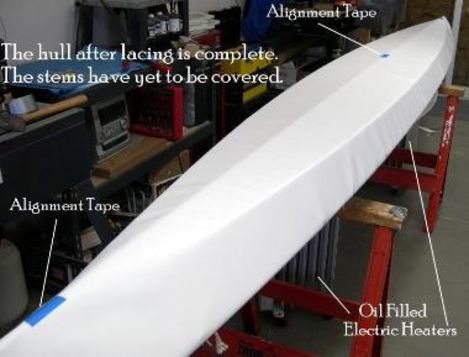
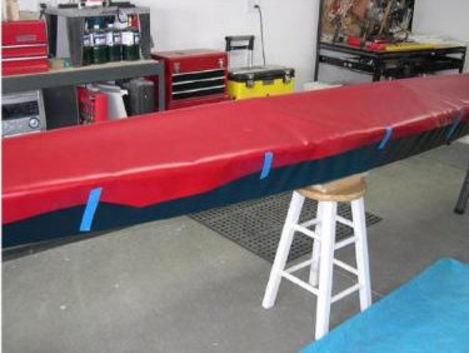
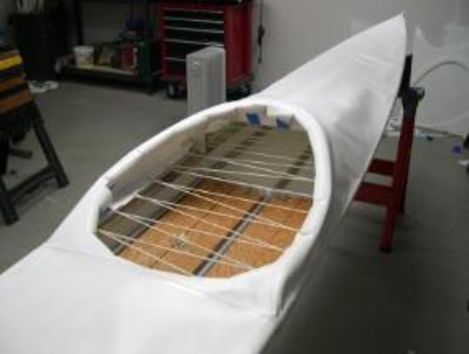
A view of the hull after lacing is complete. There are a few wrinkles in the one piece PVC hull skin, usually between the gunwale and chines.
Covering the Stems
Rub Strip Method
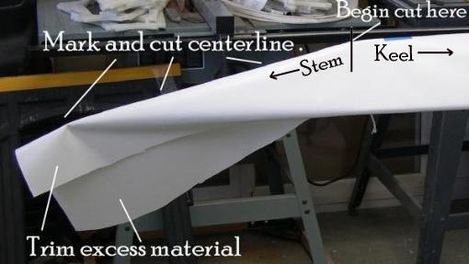
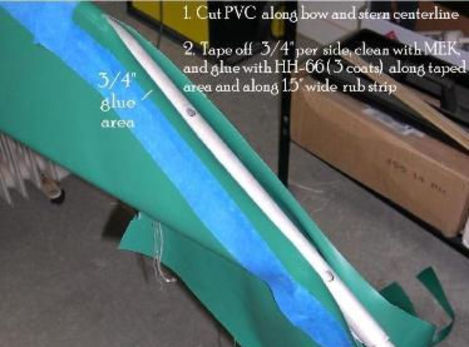
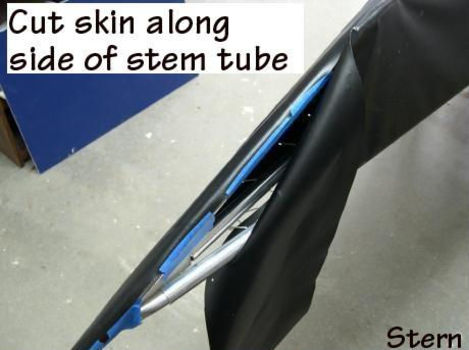
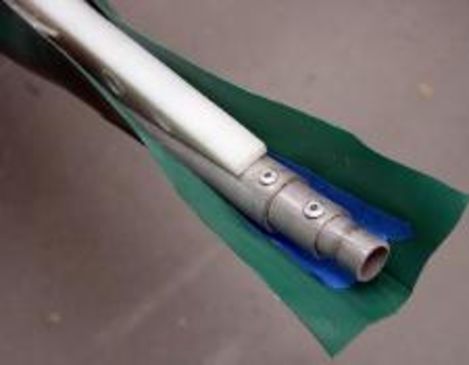
Pull one side of the excess PVC up and over the stem tube and mark a line down the center of the tube. Cut along this line with a razor knife starting at the keel / stem bend. Repeat this process with the excess skin from the other side of the stem tube.
Next, a rub strip will be glued over the stems.
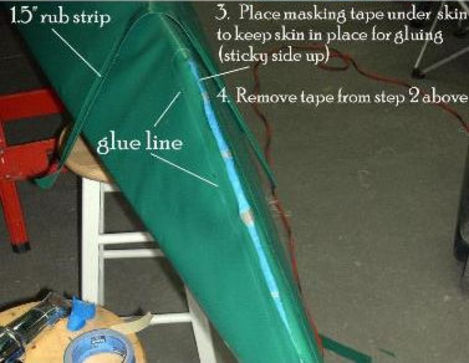
After cutting the skin along the centerline of the stern tube ( step 7) place masking tape along the stem allowing a 3/4" space for gluing on each side. Clean the area to be glued with MEK and apply 3 coats of vinyl cement allowing it to dry completely. Cut out a 1.5" wide rub strip and prep and glue it also. The rub strip should be at least 1 inches longer than the opening on either side.
After the glue has dried place several pieces of masking tape ( glue side up) inside the opening to hold the skin down for gluing.
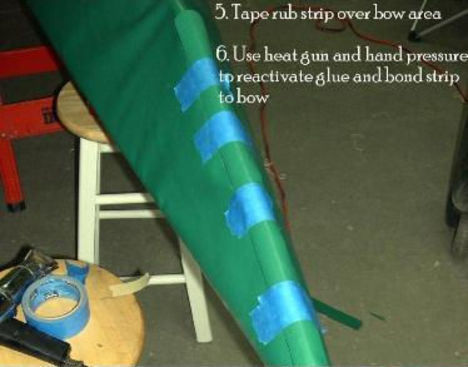
Position the rub strip over the stem and hold in place with masking tape. Use a heat gun to reactivate the cement and apply pressure. Start at the keel to stem transition, and work your way towards the end of the stem.
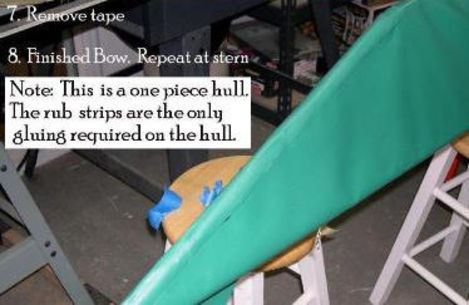
Remove the masking tape, apply more heat and pressure until a good bond is achieved. Repeat this process at the stern.
A straight stem like the one pictured is easier to work with since the rub strip doesn't follow a curve as well.
The one piece hull is now complete. It's time to turn the kayak over and begin the deck skinning process.
Overlap Method
This is an
alternative method of covering the stems using no rub strip.
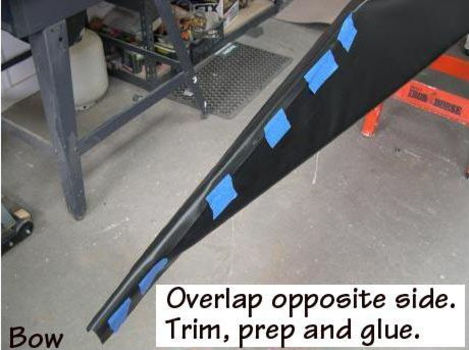
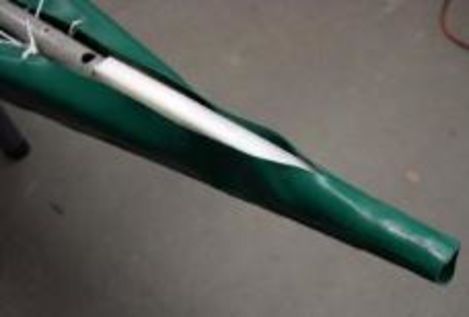
Cut the skin along the stem tube and overlap the two sides.
Trim the overlapping side, prep, and glue.
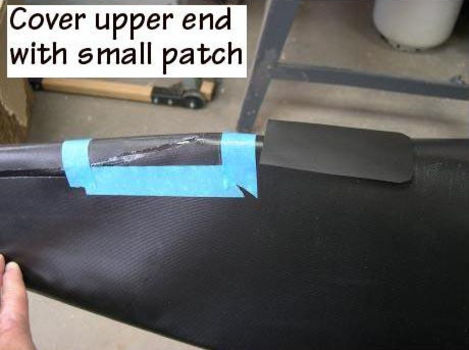
At the beginning of the overlap ( keel to stem bend ), the initial narrow glued area can be covered with a small strip of PVC to insure that the overlap is waterproof.
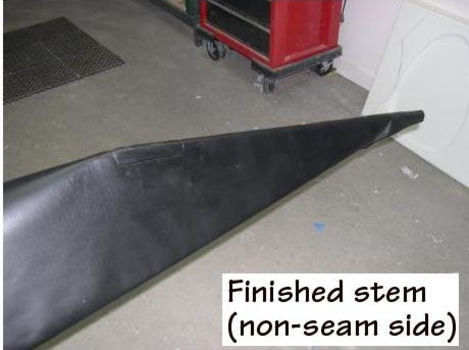
The underside of the hull is now completed.
Closing Bow and Stern
Turn the
frame over and place on sawhorses. A carpet cradle or a set of foam
carriers are used to hold the frame upright. Notice how close the lacing
is to the ends.
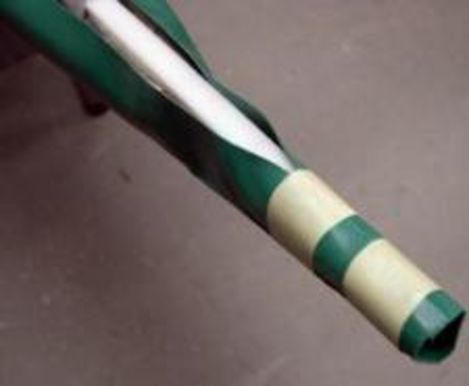
Trim the excess PVC from around the stems, leaving 1/2" extended past the ends.
Loosely
overlap the skin around the stem and mark the area to be glued. After
MEK and cement is applied to both surfaces, overlap and secure with
masking tape. Insure that the overlap is quite loose as the stem tube
will slide in and out of this enclosure during assembly.
Apply heat and pressure to insure a good bond. Duplicate the process at the stern.
Covering the Deck
The deck shape determines whether a one or multiple piece deck is required. If the deck is peaked fore and aft like the "Symetric" shown here, a one piece deck works fine. Flat decked kayaks such as Klepper or Folbot, can be made in one piece also. A deck that is peaked forward, flat aft, or has a slope at the coaming, requires a multi -piece deck . The "Sea Rider" Greenland kayak on the previous page uses multiple sections. Any deck can be made in several sections if conditions warrant.
One Piece
Position the skin over the frame.
Trim to within 3 inches of the gunwales and allow a
few inches of overhang at the ends. Tape the skin to the hull every
couple of feet with masking tape to hold the skin in place while marking
the trim line.
Trim the
deck skin at the point it intersects the stem tube. ( Symetrik) The
cutoff is at this location to insure that the PVC will lay flat.
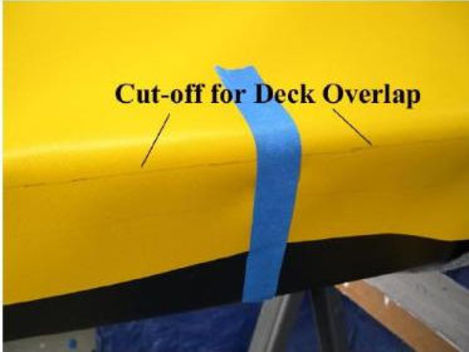
Walk along
the length of the kayak marking a line (pencil) at the base of the
gunwale tube. This line will be the cut-off for the deck skin prior to
gluing deck to hull. The overlap of the gunwales will be about 1 inch. (
Combi-Double).
On
most kayaks, the deck skin will go to the ends.
After
marking the trim line at the gunwales, cut off the excess material with
scissors. Place masking tape along the entire hull length to serve as a
border for the area to be prepped and glued. This keeps the glue from
overlapping onto the hull skin below. ( Tape not shown in photos)
Clean the glue areas of the deck and hull with MEK and brush on HH-66
cement. Once dry, re-position the deck on the frame and hold in place
with masking tape.
Starting at the bow, heat and use hand pressure to bond the deck to the
hull. Glue a couple of feet on one side, move to the other side, and
continue this back and forth process until the deck is finished. Be very
careful to keep the PVC from moving.
Go back over the glue joints a second time to insure that a good bond is achieved. Use a light touch when gluing, and go back over the area again with more heat /pressure.
Note
If glued properly, the vinyl coating, under extreme stress, will
delaminate from the polyester core before the glue joint fails.
Multiple Pieces
A single section of PVC will not conform easily to the compound deck shape of a folding Greenland kayak. I've found it easier to use multiple sections, especially on a folding skin.
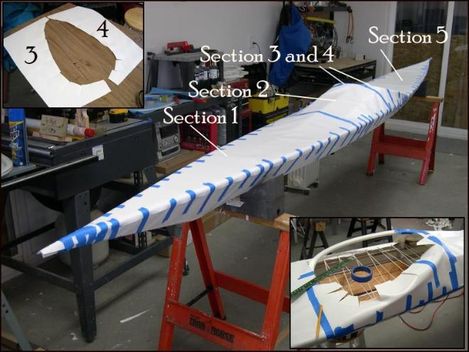
The "Sea Rover" has a 5 section deck. Sections 1 and 2 are glued to the
hull and to each other with 1 inch overlaps of the PVC.
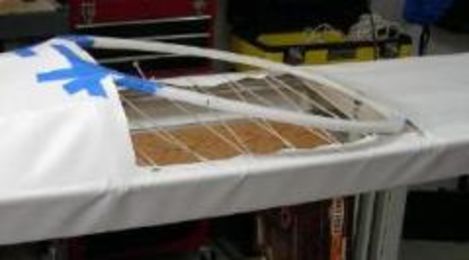
Section 5 is glued to the aft hull. The coaming area receives two sections of PVC. ( Sections 3 and 4).
The cuts in sections 3 and 4 allow the PVC to wrap under the coaming base plate for Velcro connection.


